VMware Cloud Foundation (VCF) 9 is the first major release delivered under Broadcom, and it brings several structural changes to how the platform is deployed and operated. The release continues to move the private-cloud experience in the direction of public-cloud consistency by improving integration, automation, and overall operational alignment.
A key change is the new VCF 9 Installer. Instead of the older Excel-driven Cloud Builder workflow, the installer now provides a more predictable and streamlined process. Notable updates include:
A wizard-based UI for guided deployment
Stronger built-in validation
Support for JSON configuration files
Wider deployment coverage to minimize post-installation tasks
Admins can now either walk through the interactive wizard or upload a JSON file to automate the deployment end-to-end.
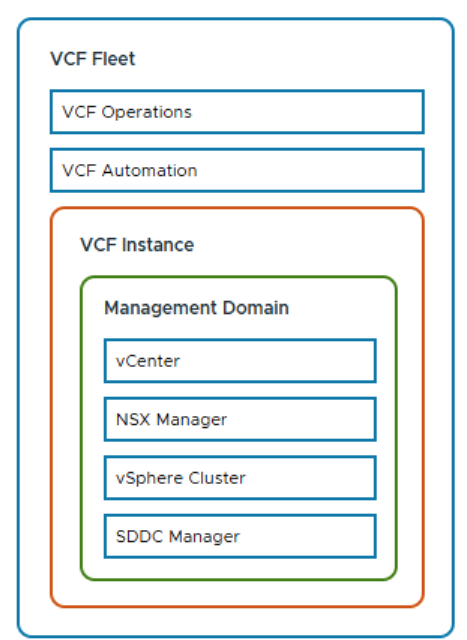
Before jumping into the guide, let’s take a quick look at VCF from a high level. The diagram below outlines the main components of a VCF 9 deployment. At the top is the VCF Fleet layer, where Operations and Automation manage multiple VCF instances from a central point. Each individual instance contains its own vCenter, NSX Manager, vSphere cluster, and SDDC Manager, forming a complete, self-contained environment.
Published 12.12.2025
Accurate DNS configuration is just as important in VCF 9 as in earlier releases. Any missing or incorrect records will cause the pre-checks to fail. The table below shows the DNS entries required for my environment.
Purpose Info
VCF 9 Installer VCF Installer node (bring-up)
ESX ESXi host 01 (Mgmt Domain)
ESX ESXi host 02 (Mgmt Domain)
ESX ESXi host 03 (Mgmt Domain)
ESX ESXi host 04 (Mgmt Domain)
vCenter vCenter Server for Mgmt Domain
SDDC Manager SDDC Manager VIP / Management
VCF Automation VCF Automation appliance
NSX VIP NSX Manager Cluster Virtual IP
NSX Manager NSX Manager Node 01
NSX Manager NSX Manager Node 02
NSX Manager NSX Manager Node 03
VCF Operations (Primary) Aria Ops (VCF Ops) Primary Node
VCF Operations (Replica) Aria Ops (VCF Ops) Replica Node
VCF Operations (Data) Aria Ops (VCF Ops) Data Node
VCF Operations (Collector) Aria Ops (VCF Ops) Remote Collector
VCF Fleet Management VCF Fleet Manager appliance
There are additional prerequisites, but for now we’ll focus on the VCF deployment itself. Naturally, the ESXi v9 hosts must already be installed.
VCF Installer Deployment
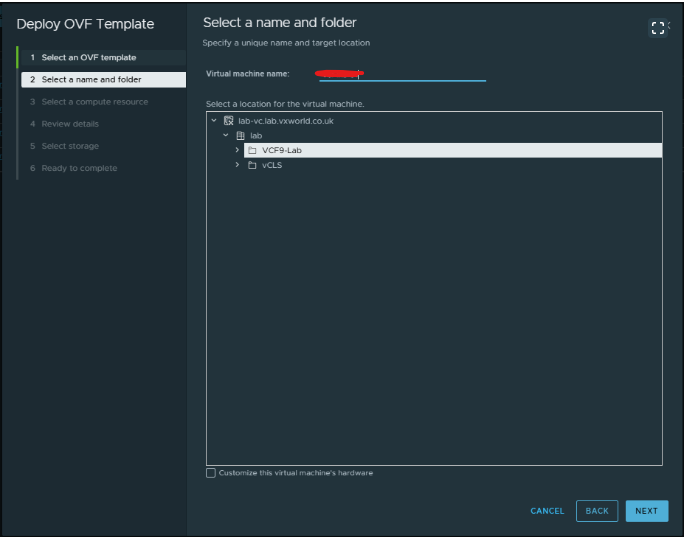
The VCF 9 Installer is provided as an OVA package and can be downloaded from Broadcom’s support portal. It can be deployed on any standalone ESXi host, typically one of the hosts designated for the Management Domain.
In my case, I deployed the installer in our existing vSphere environment to keep things simple and avoid unnecessary host-side setup during the initial phase.
Deploying the installer is straightforward. Simply deploy it like any other VM and provide the required inputs such as passwords, NTP servers, DNS settings, and so on. After completing the customization and clicking Finish, the VCF 9 Installer appliance is deployed.
Once powered on, it will auto-configure based on the parameters you provided and should be ready to use after a few minutes.
VCF Installer: Binary Management
Once the VCF 9 Installer appliance is deployed and running, the next step is to download and organize the deployment binaries.
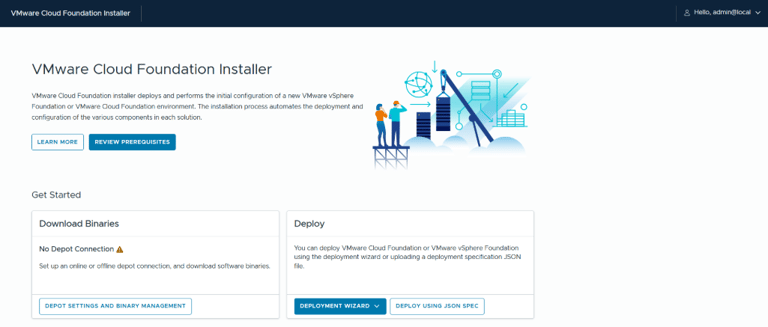
These files include all components required for bring-up, such as vCenter, NSX, SDDC Manager, Fleet Manager, VCF Operations, and VCF Automation. After logging in to the VCF Installer UI, you’ll be presented with the following view.
Press the depot settings and binary management for downloading the binaries we need to deploy VCF 9.
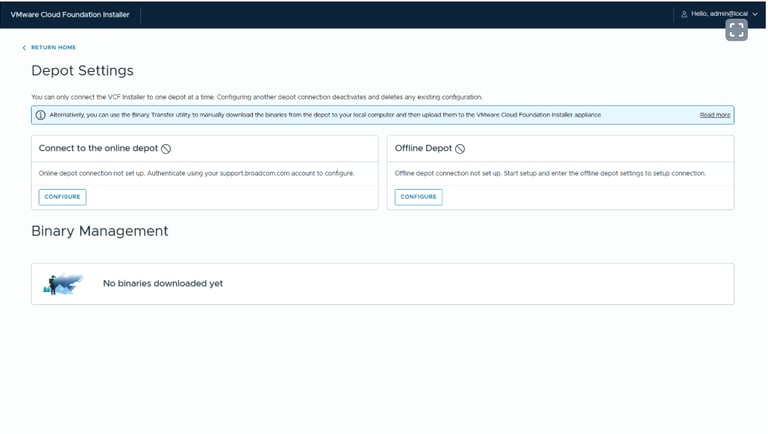
You can now choose between using the online depot or an offline depot. In this example, I’ll be connecting to the online depot. If needed, a proxy can also be configured for the online depot connection.
TIP:
The software depot address has been updated to dl.broadcom.com for all VCF products and components. Make sure that all relevant systems have firewall access to this new endpoint.

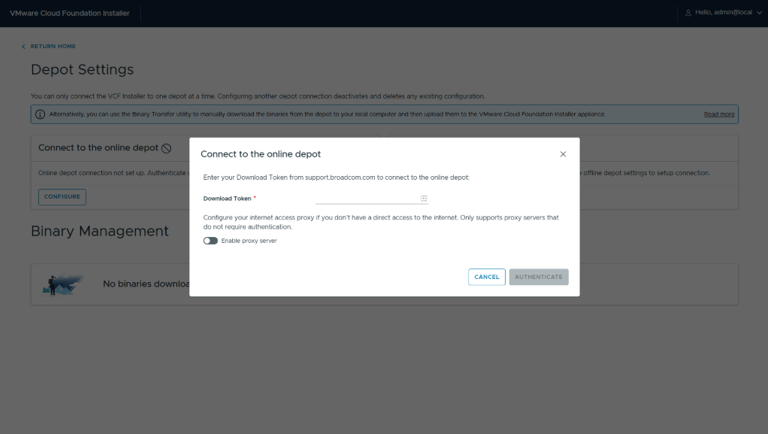
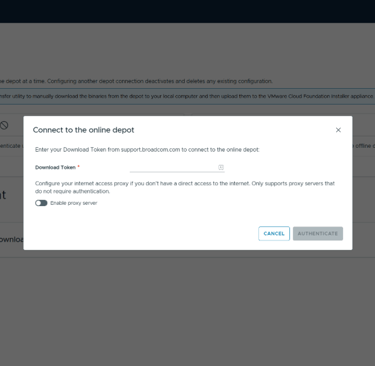
Next, you’ll need to obtain your download token. Log in to the Broadcom Support Portal and navigate to My Dashboard. Scroll down, and on the right-hand side under Quick Links, you’ll find the option to generate a download token.
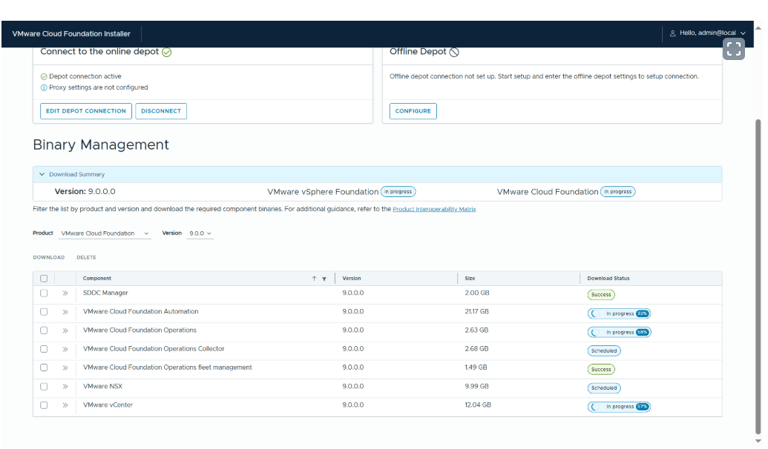
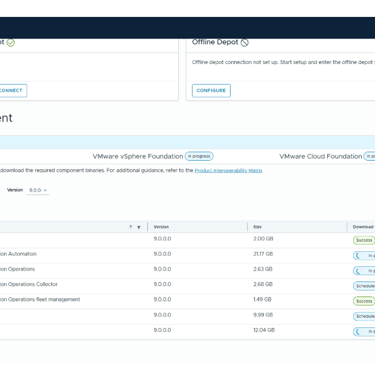
With the configuration complete, you can begin downloading the binaries. Select all required products and start the download process. I encountered a temporary issue where the VCF Automation binary failed on the first attempt, but clicking Retry resolved it.
With the prerequisites completed and all VCF 9 binaries successfully downloaded and validated, we can move on to the main event, the deployment. This is where the real deployment work happens: defining the management domain, validating the underlying infrastructure, and provisioning the core components of your private cloud.
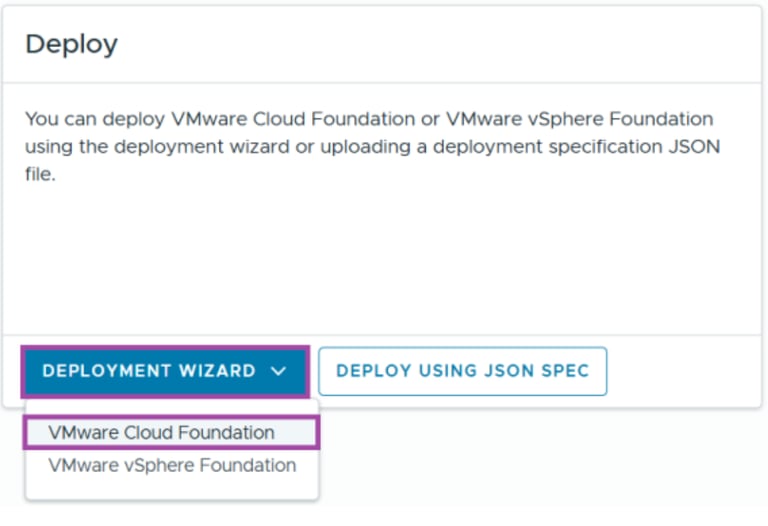
Deployment wizard:
Step 1.
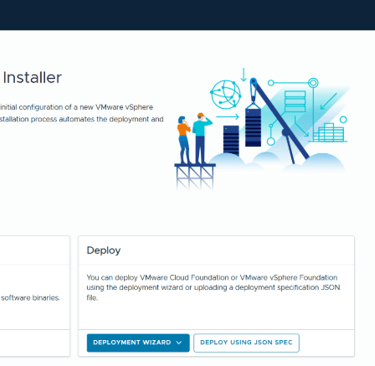
After launching the deployment, a dropdown menu appears. Select VMware Cloud Foundation to start the installation. You can also choose to deploy using a JSON file. I prefer completing the wizard first and then downloading the generated JSON file for use in future deployments or as a backup of the configuration.

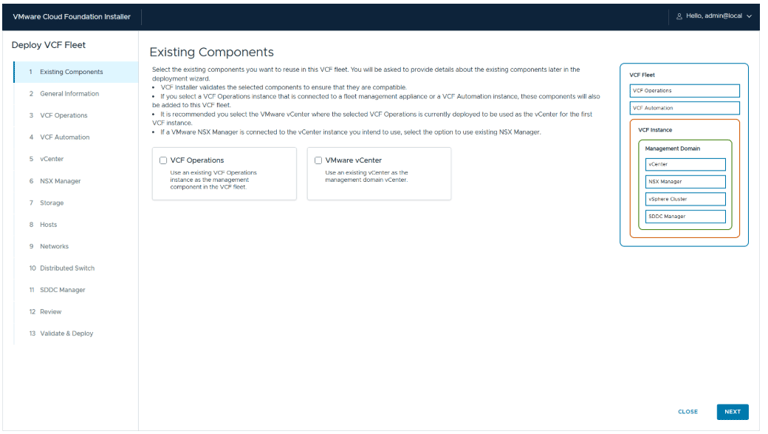
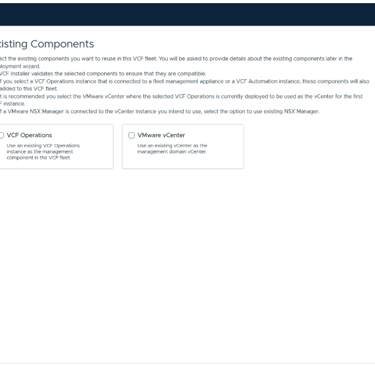
Step 2 - Existing Components
If you're are upgrading an environment and need to import an existing VCF Operations instance or VMware vCenter, you can select the appropriate checkboxes. In my case this is a greenfield deployment, so I’ll simply continue to the next screen. On the right side, you’ll see a simplified overview of the VCF design. This diagram updates automatically based on the selections you make in the wizard.
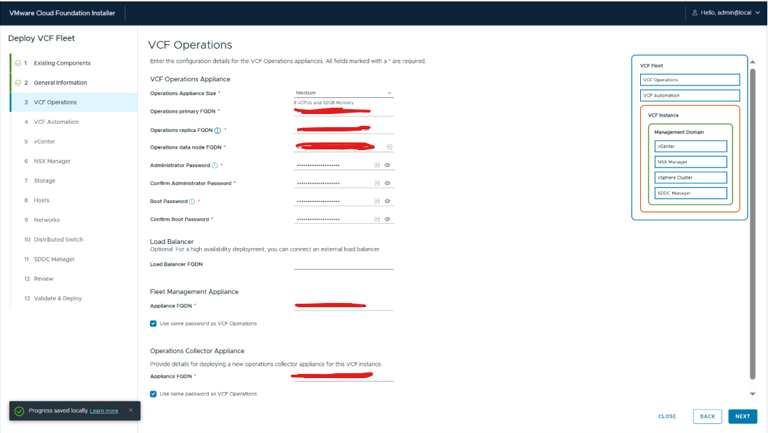
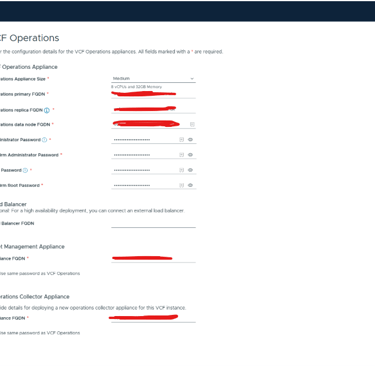
Step 4 - VCF operations.
On this page, you define the configuration for the Operations components, including:
Operations Appliance Size
Operations Primary FQDN
Operations Replica FQDN
Operations Data Node FQDN
Administrator Password
Root Password
Load Balancer FQDN (optional)
Fleet Management Appliance FQDN
Operations Collector Appliance FQDN
This step ensures that all Operations-related services are correctly named and sized before deployment.
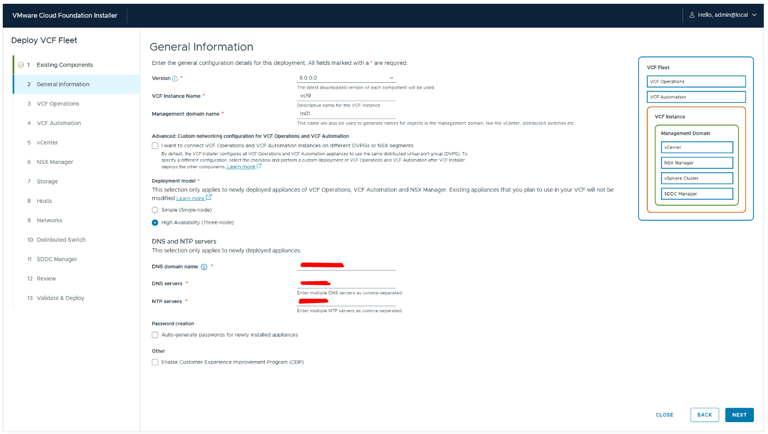
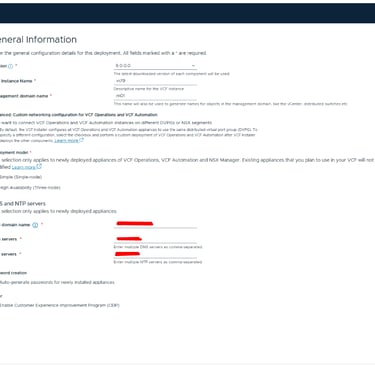
Step 3 - General information.
In this step, you select the VCF version to deploy, the name of the VCF instance, and the name of the management domain.
You can also enable Custom Networking if you want Automation and Operations to use different DVPGs or NSX segments.
If you enable this option, Automation and Operations will not be deployed automatically and you will need to deploy them later using a simple API call to the SDDC Manager. When selected, the design diagram on the right will update to reflect this change.
You must also choose whether this deployment should run as a clustered setup or a single-node instance.
Additionally, provide the required domain name, DNS servers, and NTP servers.
You can choose to auto-generate passwords, but from experience, I prefer deploying all components with the same password and then rotating the credentials after deployment and initial configuration. This makes the setup phase faster and more convenient.
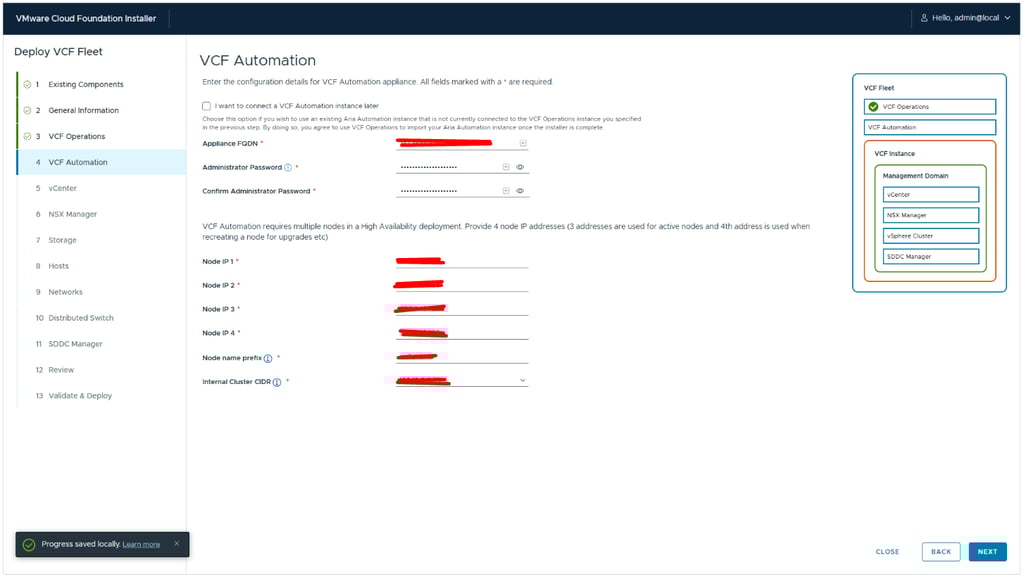
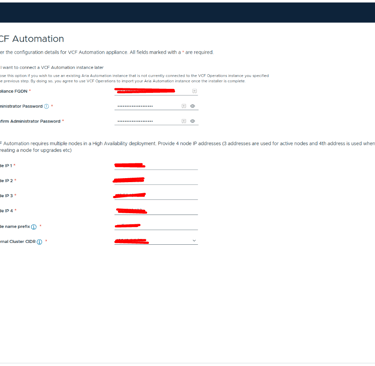
Step 5 - VCF automation.
On this page, you define the configuration for the Automation components, including:
VCF Automation Appliance FQDN
Administrator Password
Node IP 1–4
Node name prefix (Automation will automatically append a random four-letter postfix)
Internal Cluster CIDR
You can also choose to skip installing VCF Automation at this stage. Even though the wizard says to import Automation after the deployment is complete, you can instead perform a fresh installation later directly from Fleet.
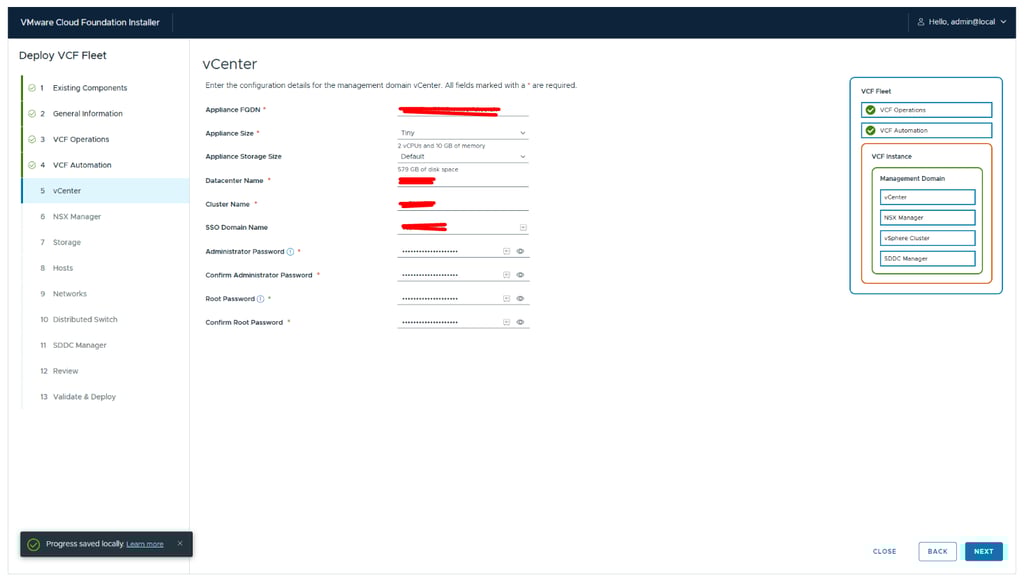
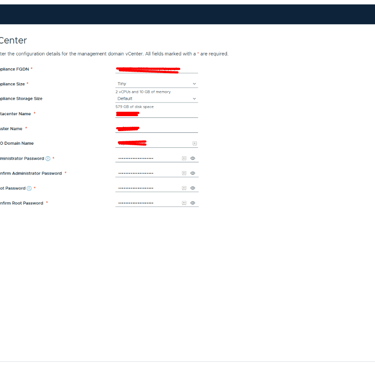
Step 6 - vCenter.
On this page, you define the configuration for the vcenter components, including:
Appliance FQDN
Appliance Size
Appliance Storage Size
Datacenter Name
Cluster Name
SSO Domain Name
Administrator Password
Root Password
Remember, you can change the datacenter name and cluster name later.
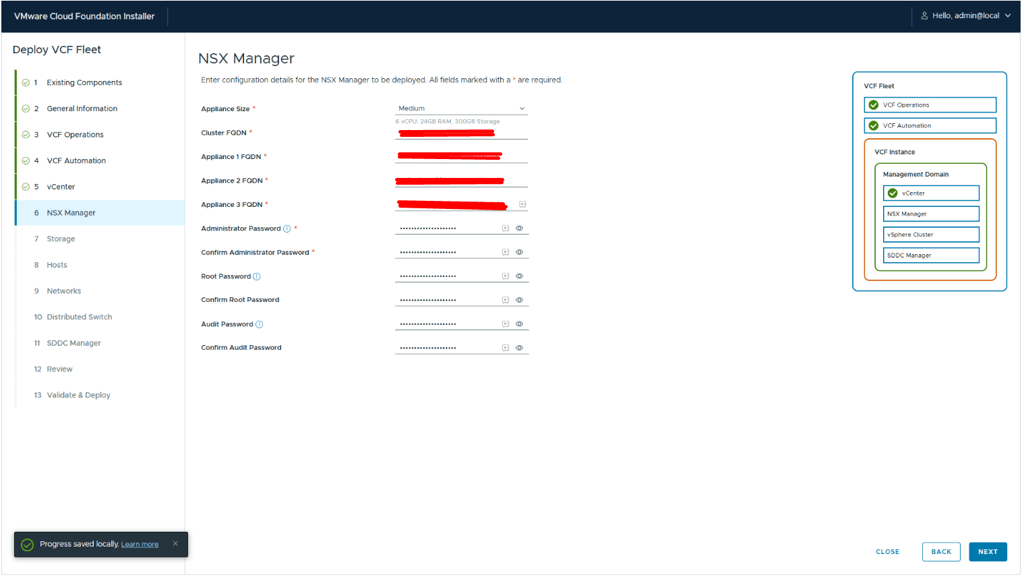
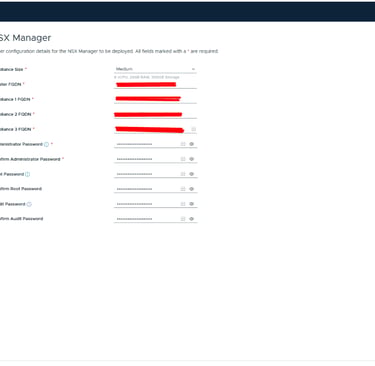
Step 7 - NSX manager.
On this page, you define the configuration for the NSX manager components, including:
Appliance Size
Cluster FQDN (VIP)
Appliance 1 FQDN
Appliance 2 FQDN
Appliance 3 FQDN
Administrator Password
Root Password
Audit Password
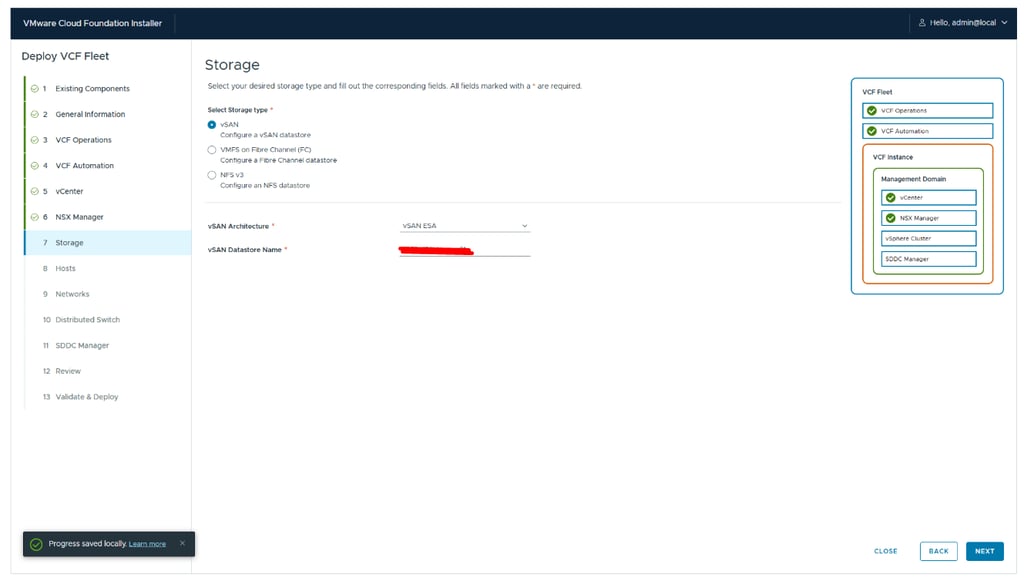
Step 8 - Storage.
Select the storage type: vSAN, VMFS on Fibre Channel, or NFS v3.
This is new in VCF 9, which now supports all three options as valid storage types during deployment.
If you choose vSAN, you must also specify:
vSAN Architecture
vSAN Datastore Name


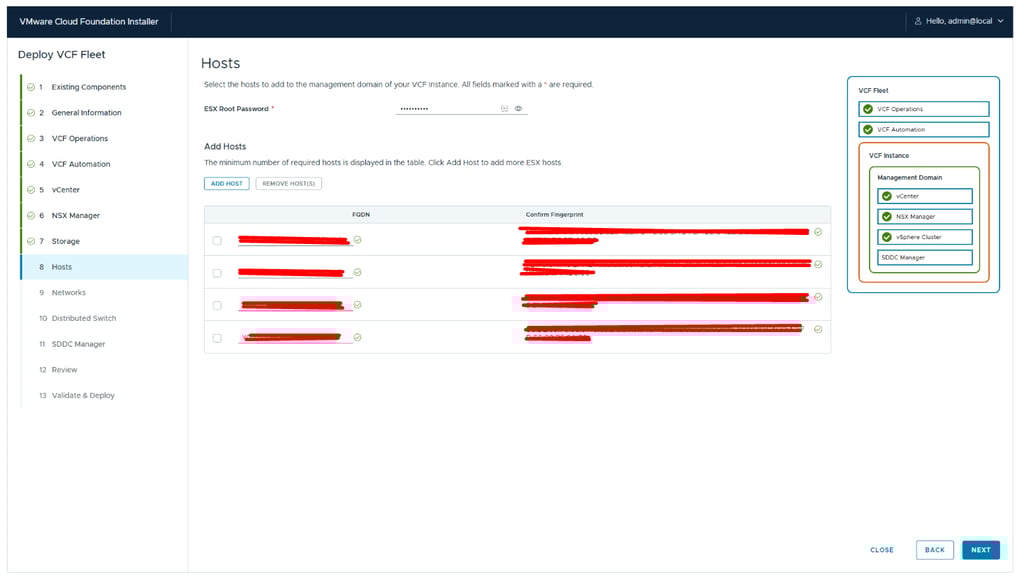
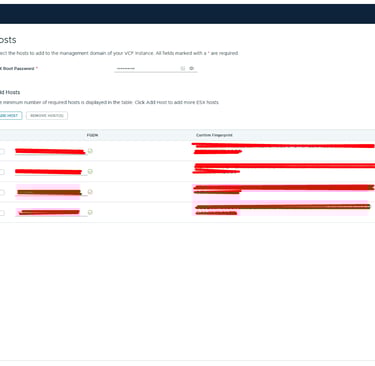
Step 9 - Hosts.
Enter:
SSH Root Password
FQDN for each of the management domain hosts
A great improvement in VCF 9 is that you can now add more than four hosts during the initial deployment.
After adding the management hosts, click Add next to each one. When all host fingerprints have been retrieved, click Confirm All Fingerprints.
Once everything is confirmed, click Next to continue.
If you get any java error, try to Generate SSL Certificates with the correct CN.
If you run this command you can see what fqdn the certificate uses:
openssl x509 -in /etc/vmware/ssl/rui.crt -noout -text
if it says localhost run the command below:
/sbin/generate-certificates
reboot
Step 11 - Distrubuted switch
Next, configure the Distributed Switch. The available network topologies are automatically determined by the number of physical network interfaces (NICs) on each host. You can click View Topologies to review the supported designs, or choose Custom Switch Configuration if you want to define the setup manually.
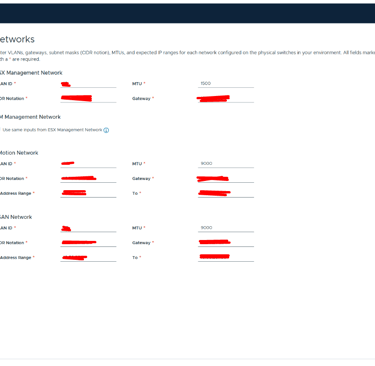
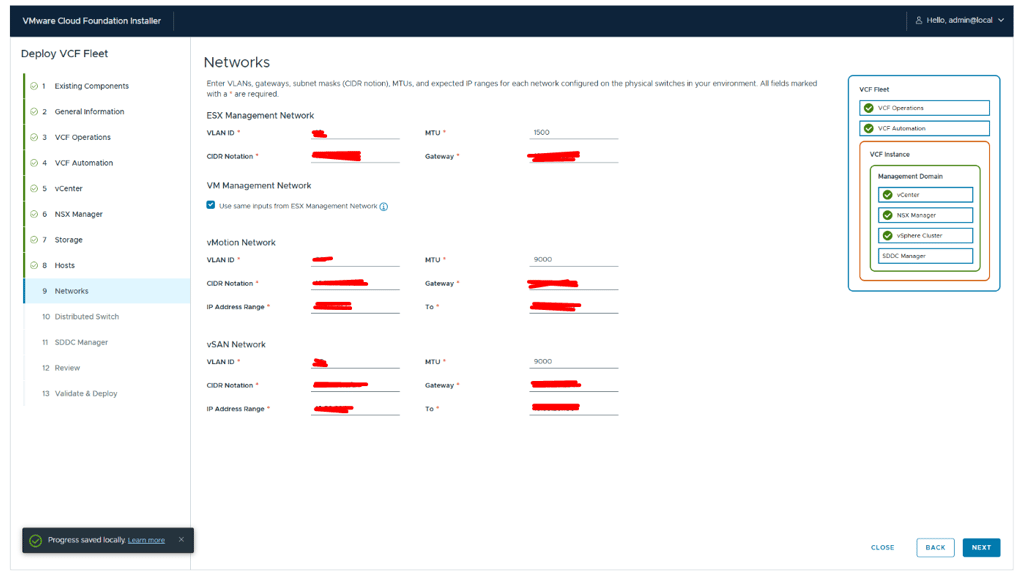
Step 10 - Networks.
Enter the network configuration for the ESXi hosts:
ESXi Management Network
VLAN ID
CIDR Notation
MTU
Gateway
VM Management Network
You can choose to reuse the settings from the ESXi Management Network, or specify them individually:
VLAN ID
CIDR Notation
MTU
Gateway
vMotion Network
VLAN ID
CIDR Notation
Gateway
MTU
IP Address Range (Start → End)
vSAN Network
VLAN ID
CIDR Notation
Gateway
MTU
IP Address Range (Start → End)
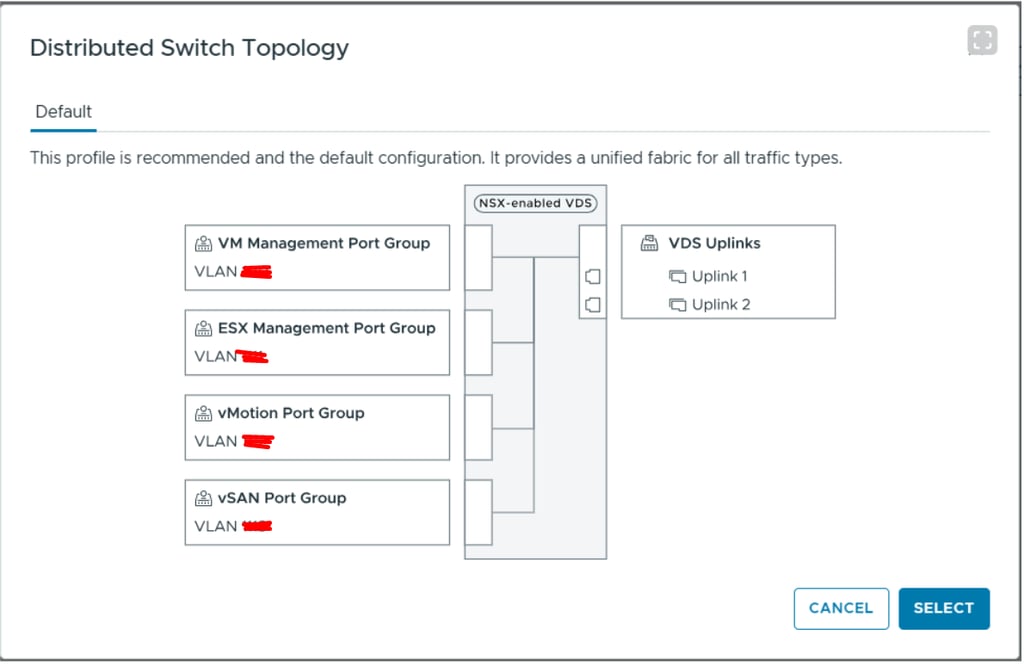
The illustration below shows the default Distributed Virtual Switch topology.
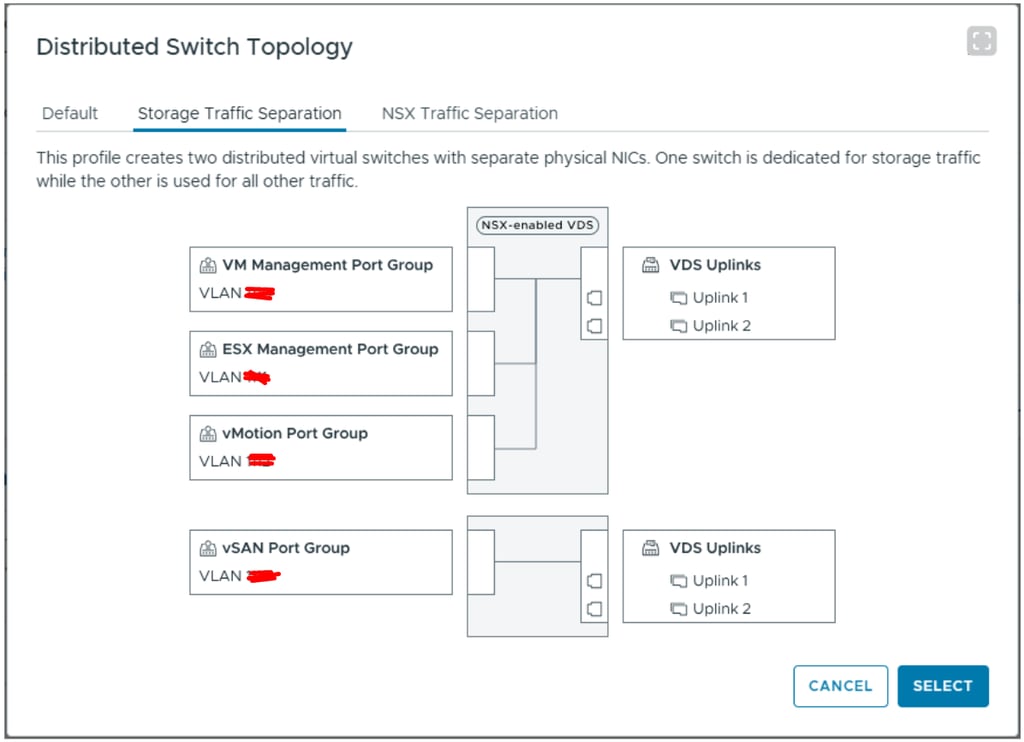
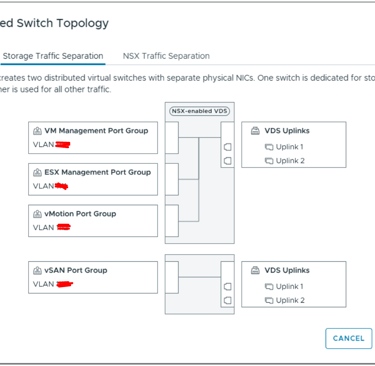
The diagram below shows a Distributed Virtual Switch topology where storage traffic is separated from the remaining network traffic. The same design approach can also be used to isolate NSX traffic, if required.
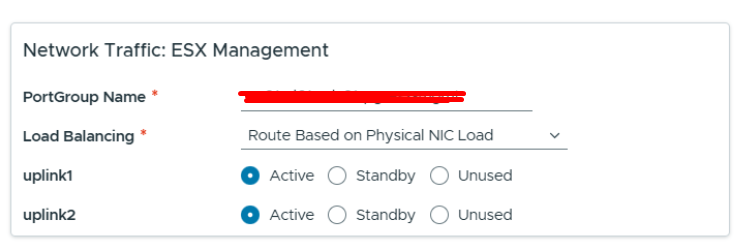
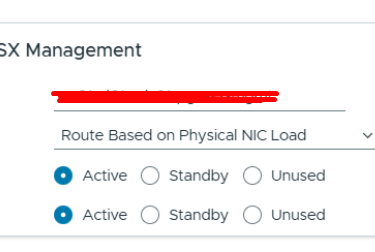
I selected the default Distributed Virtual Switch topology, so the next step is to extend the vDS and configure its required settings. This includes defining the port group names, choosing the appropriate load-balancing policy, and determining how the uplinks should be mapped and organized.
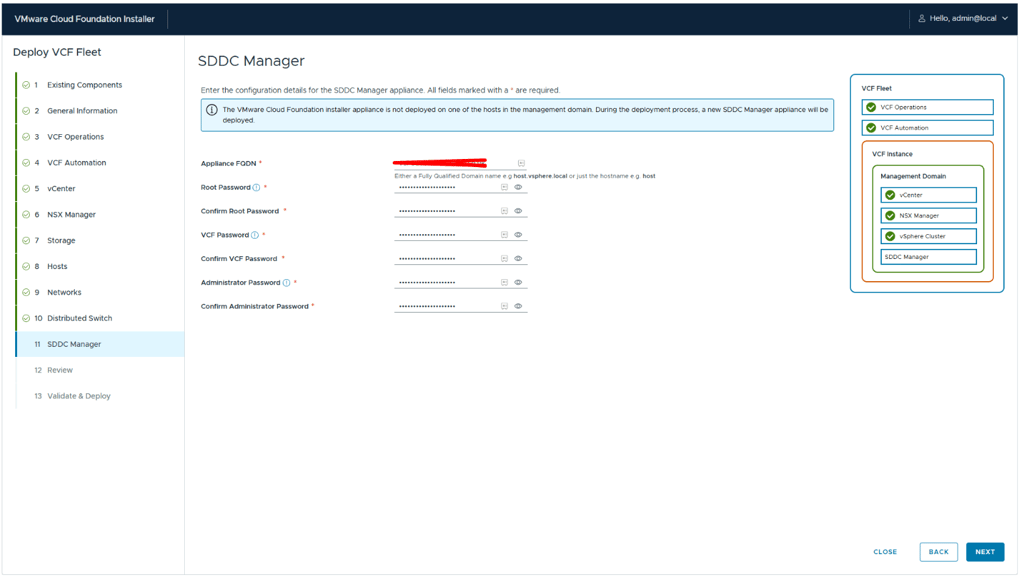
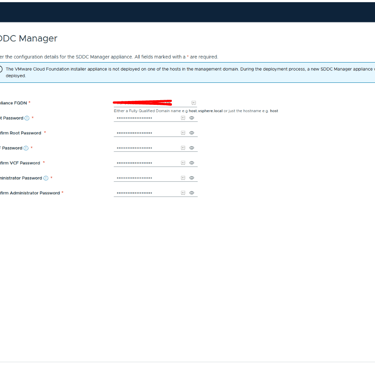
Step 12 - SDDC manager
Provide the required SDDC Manager details:
SDDC Manager Appliance FQDN
Root password
VCF password
Administrator password
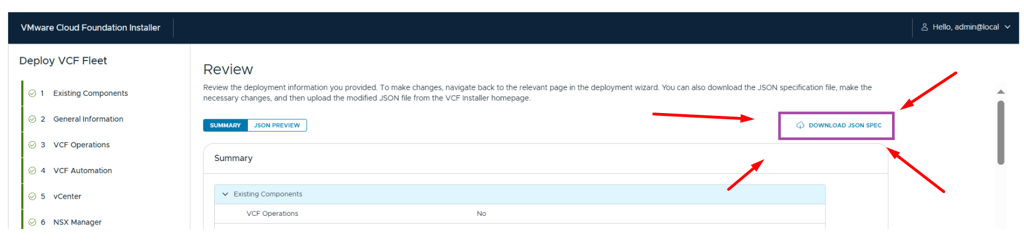
Step 13 - Review
You are now almost ready to start the deployment. On the Review page, take some time to verify all configured settings.
From this page, you can also download the JSON configuration file. It is highly recommended to do so, as it makes redeployments or future reference much easier. Keep in mind, however, that the JSON file contains all passwords in plain text and should be stored securely.
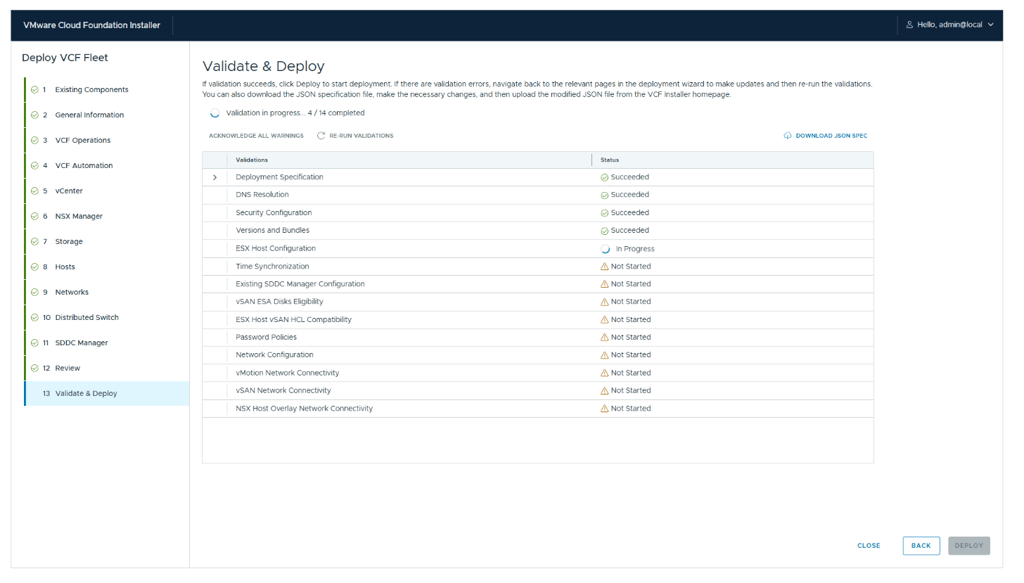
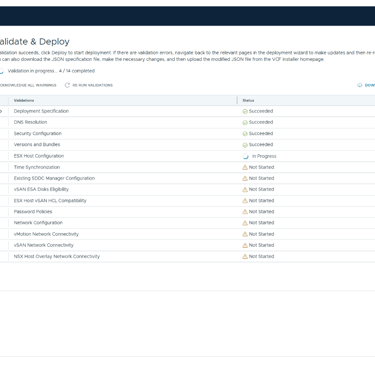
Step 14 - Validate and deploy
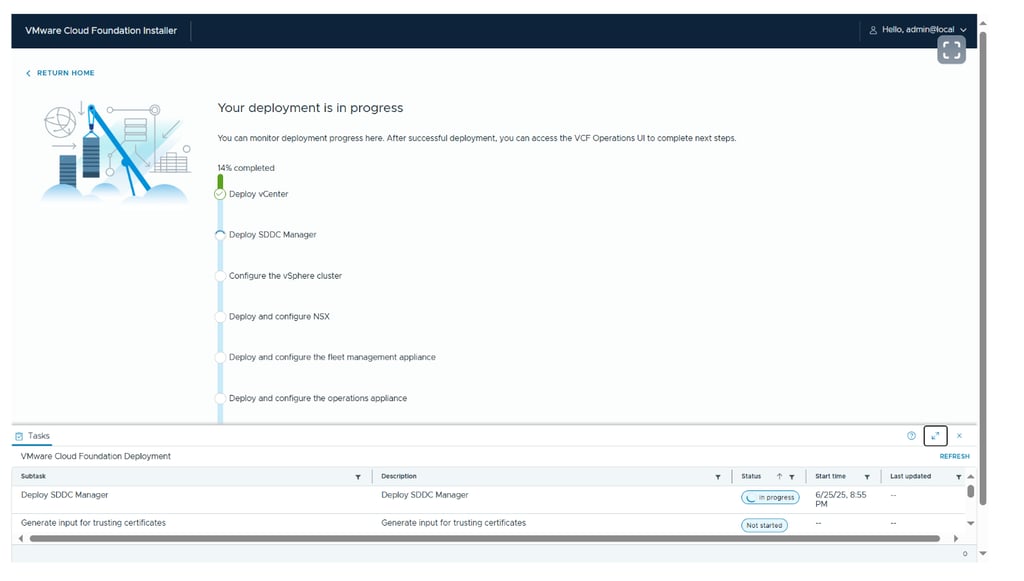
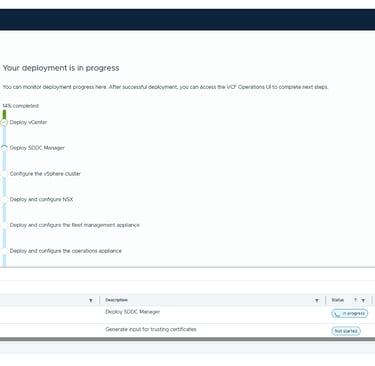
This is the final step. Let the prechecks complete successfully, then click Deploy to start the deployment process.
Issues Encountered During Deployment
vSAN disk group remnants on reused hosts
We reused some older vSAN nodes for the deployment. After reinstalling them with ESXi 9, we discovered that residual vSAN partitions were still present on the disks. To clean this up, we removed the existing disk groups using the following steps:
List existing vSAN disk groups and note the disk group ID:
esxcli vsan storage list
Unmount the disk group:
esxcli vsan storage diskgroup mount -u "<diskgroup-id>"
Remove the disk group:
esxcli vsan storage remove -u "<diskgroup-id>"
VCF Installer not converting to SDDC Manager
During deployment, we encountered an issue where the VCF Installer did not successfully convert into SDDC Manager. To avoid this, we recommend deploying the VCF Installer on a separate ESXi host if you have access to another environment.
Certificate issues (hostname resolving to localhost)
We also experienced certificate-related issues where the hostname resolved to localhost. This was resolved by regenerating the host certificates and rebooting the host:
/sbin/generate-certificates
reboot
VMware Cloud Foundation 9: VCF installer walkthrough
Conclusion:
Deploying VMware Cloud Foundation 9 using the VCF Installer and guided wizard is, overall, a solid and well-structured experience but it’s not entirely without its sharp edges.
The installer does a great job of abstracting away much of the underlying complexity, guiding you step by step through what would otherwise be a very manual and error-prone process. When everything is aligned with correct images, metadata, compatible tooling, clean hosts, and valid certificates the deployment flows smoothly and delivers a fully integrated, modern private cloud platform with relatively little friction.
The key takeaway is preparation and validation. Spend time verifying host cleanliness, image sources, metadata, certificates, and tool versions before you start the installer. It will save you hours or days of troubleshooting later.
Hopefully, this walkthrough helps you avoid some of the pitfalls we ran into and gives you a smoother first experience with VCF 9. If you do hit unexpected behavior, don’t assume you’re doing something wrong sometimes it’s just a small detail hiding in the background.
VirtualViking
Plundering the Old Ways, Automating the New!
Tech
© 2024. All rights reserved.